
Advanced File Recovery:Data loss is a critical situation when you are about to lose your hard work and precious memories. The moment you realize such a situation, you should perform the most effective troubleshooting steps on how to recover data from a hard drive. We have listed the best built-in utilities that can help you recover data from the hard drive. When nothing works, you can use one of the best data recovery software available to recover deleted data on the PC.
Manually Recovering Hard Drive Data
Manual methods can restore lost data, especially if the loss was recent or you backed up your data. These methods usually stop data loss and can fix the situation without tools. Manual processes of how to recover data from a hard drive are popular for hard drive data recovery.
Method 1: Look for Your Files in the Recycle Bin
The Recycle Bin is the first place to look for any deleted data on your hard drive. If the data is temporarily deleted or the data is small in size, you can find it here. Try these steps to get it back to its original destination.
Step 1: Your screen usually displays the Recycle Bin icon. Double-clicking it opens the temporary deleted file folder.
Step 2: You can choose a file manually or use the search bar in the Recycle Bin. The search bar is beneficial in recycling bins with many files.
Step 3: After finding the file, right-click and select “Restore.” Hard drives restore erased files to their original locations.

Step 4: If there are multiple files to restore, hold down the Ctrl key and click to select them. Click on the Restore selected files to get them back in the destination folder.
Please Note: If you have deleted the files with the Shift + Delete command, This method won’t be useful to you!
Method 2: Restore the Previous Version of the Files
Step 1: Access Windows File Explorer to navigate to the folder from where you lost files.
Step 2: Right-click on the folder and go for the ‘Restore Previous Versions’ option.
Step 3: You will be on the Previous Versions tab on the window. Let it scan and show the available restore options.
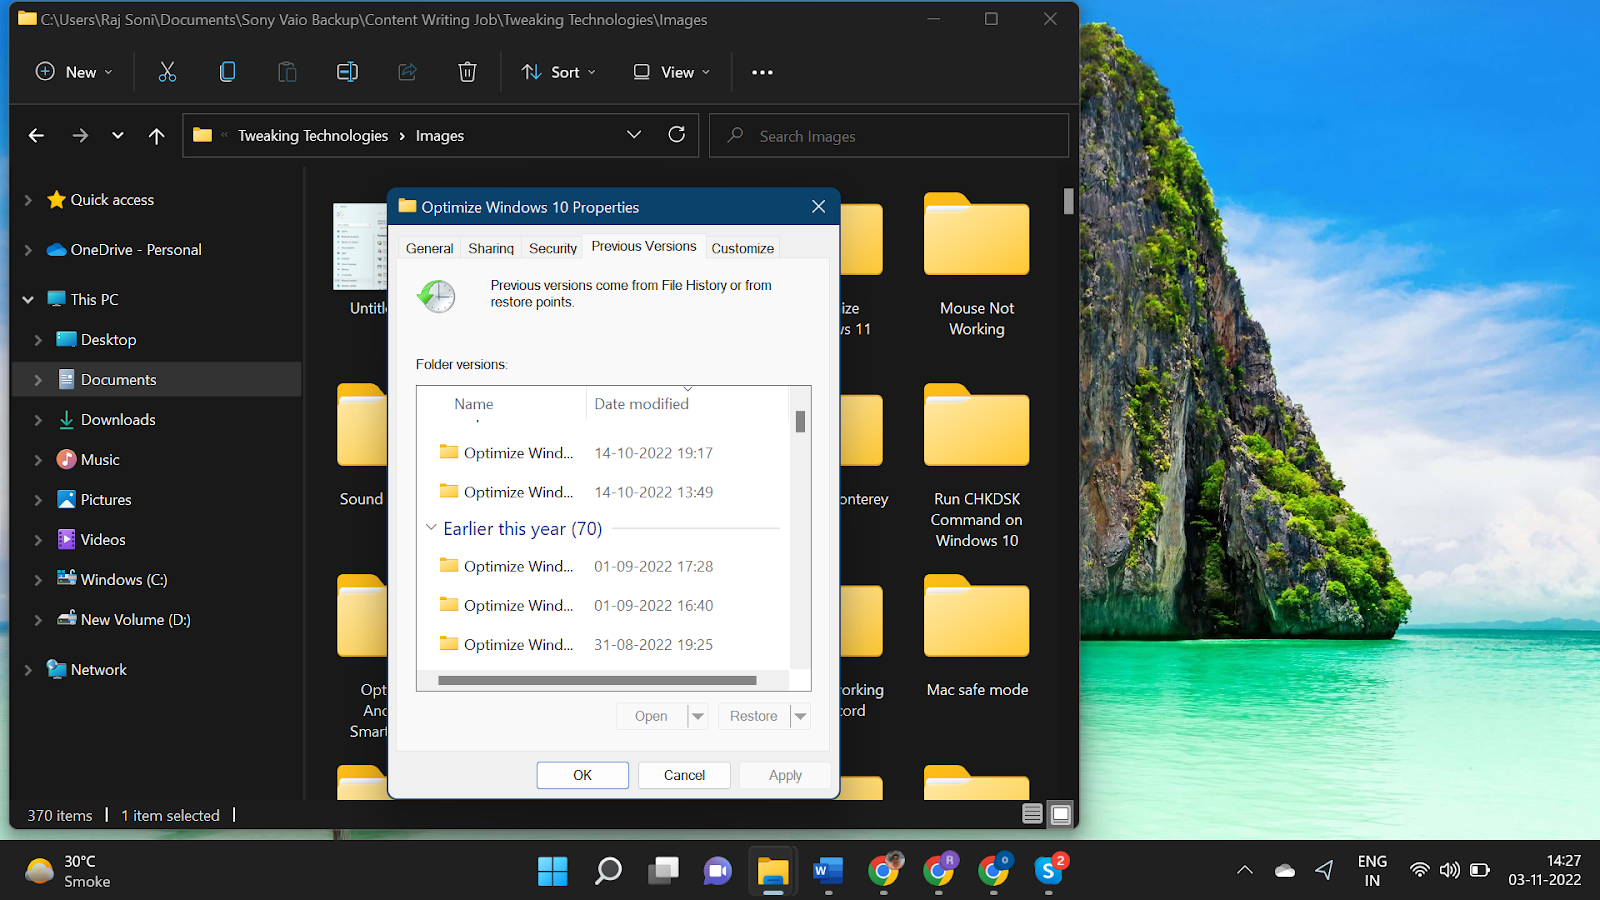
Step 4: Select the most recent one and click on the Restore button. Click on the Apply and OK buttons to restore it to its original location.
Method 3: Backup File History to a Disc
Windows File History can rapidly backup files to an external device. If you had File History turned on before losing data, this procedure can recover it.
Step 1: Connect your File History backup drive to your PC first.
Step 2: Search “File History” on Windows to open File History. Select “Restore your files with File History.” This opens a window to view newly saved files.

Step 3: You can browse your backups. File History keeps multiple copies so you can choose the best copy.
Step 4: Click “Restore” after selecting the version to restore. Your hard disc will find the file again.
You can only utilize File History if you enable it before losing data. As a prophylactic measure, it won’t help if you haven’t already.
Method 4: Restoring Data with Advanced File Recovery
Professional data recovery tools like Advanced File Recovery can help if manual methods fail. No matter the cause, this software can recover lost, deleted, or damaged complex disc files. This more thorough approach can retrieve data that manual methods cannot.
Advanced File Recovery helps restore lost, erased, or damaged complex disc files. This software’s powerful scanning algorithms can recover papers, photos, movies, and more, even if you accidentally erase them, your computer crashes, or you receive a virus. With its simple UI and powerful recovery capabilities, Advanced File Recovery ensures you never lose your data.

Step 1: Download and install Advanced File Recovery from the website. Put the software on a different drive than the data you wish to recover to avoid overwriting it.
Step 2: Open Advanced File Recovery and choose the drive to recover data. For recoverable files, the application will search this drive.
Step 3: Click “Scan” to search the drive for lost or deleted files. The software has Quick Scan and Deep Scan. Deep Scan is slower but more comprehensive at recovering files from seriously damaged or formatted discs, while Quick Scan is fast but less thorough.

Step 4: Review the recoverable files after the check. Advanced File Recovery lets you inspect files before recovering them. This helps you pick the correct ones. To save the files, click “Recover” after choosing.
Features:
Technology for Deep Scans: The software can recover data from formatted or damaged drives, making it ideal for challenging recovery situations.
Multiple file types: Advanced File Recovery can recover many files, including photos, videos, and documents.
Preview Choice: The app lets users inspect data before restoring them. This saves time and space by recovering just relevant files.
User-friendly interface: Even computer novices should be able to utilize the system. Step-by-step instructions simplify getting better.
Conclusion
Losing data is distressing, but you can usually recover it with the correct tools and approaches. Whether using the Recycle Bin or Advanced File Recovery, you must move fast and cautiously. This advice will give you the best chance of recovering your lost data and minimizing work disruption. Remember that regular backups and deliberate procedures like turning on File History can dramatically reduce the risk of data loss, making recovery more accessible and successful.