
Do you also worry “How do I improve my internet connection?” There are tweaks to adjust your computer’s bandwidth as a Windows 11 user. You are at the right place where you will get all the information related to changing your bandwidth limit on your PC.
You can manage your computer’s data transfer usage by adjusting the bandwidth limit. This setting will be useful if your internet speed could be faster. Here, we’ll walk you through setting a bandwidth limit in Windows 11. Let’s keep reading…
What is the Internet Bandwidth Limit?
The bandwidth limit of an internet connection is the maximum data transfer rate that a particular connection can support in a specific time frame. The unit of measurement is megabits per second (Mbps), but more names, such as data transfer rate, categorize it.
How Does it Affect Internet Speed?
Bandwidth is the capacity to transmit data in bits, kilobits, megabits, or gigabits per second. A higher bandwidth allows for more rapid data transfer between devices, which speeds up downloads, improves streaming quality, and makes web pages load more quickly. When downloading big files, this becomes even more important.
How to Configure Bandwidth Limit?
How do I improve my internet connection? These are the best ways to set a bandwidth limit in a computer. We should examine them.
Method 1: Use Settings
To set a bandwidth limit, go to the Windows 11 settings. Here are the steps to follow:
Step 1: Press the Windows key and then choose Settings.
Step 2: Take a look at the left pane and find Network & internet.
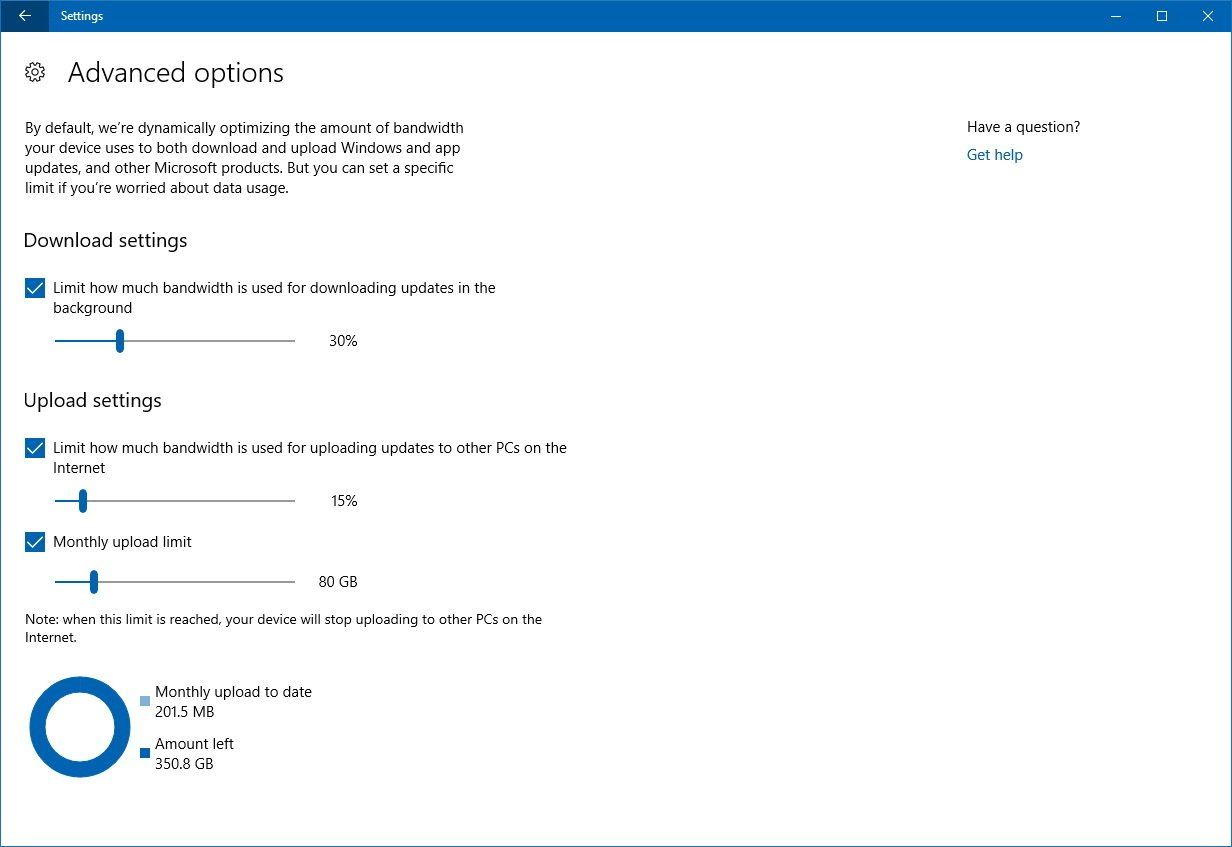
Step 3: Select Data usage from your present Wi-Fi connection. Type in the desired limit.
Step 4: From “Monthly” to “Unlimited,” choose the type of limit you’d like.
Step 5: Select the date from the drop-down menu under “Monthly reset date” to choose when the data is reset monthly. After that, enter the data limit, select the unit of measurement (MB or GB), and then hit the Save button.
Method 2: Pick up the GPEDIT Editor
You can also set the bandwidth limit using this method. Here is the necessary procedure:
Step 1: To access the Run command, press the Windows key and R.
Step 2: Press the Enter key after typing gpedit.msc into the dialogue box.
Step 3: Navigate to the following location: Computer Configuration/Administrative Templates/ Network/QoS Packet Scheduler.
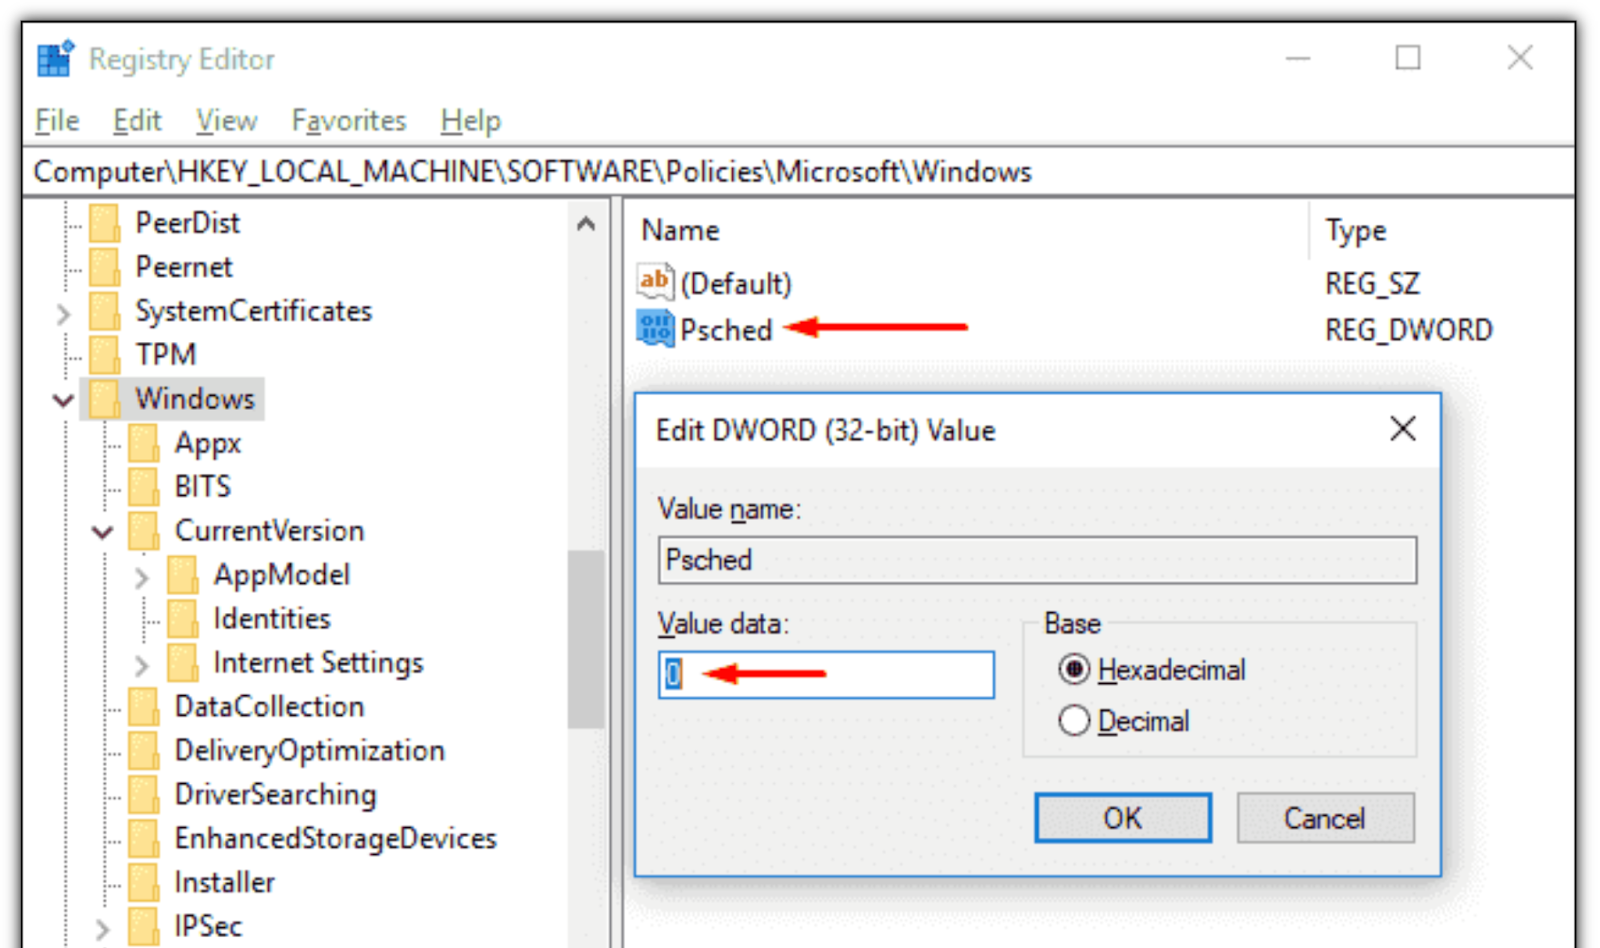
Step 4: Select Limit reservable bandwidth by double-clicking on it in the right-hand pane.
Step 5: When prompted, choose Enabled from the Limit reservable bandwidth window. Then, type a value between 1 and 100 in the Bandwidth limit field. To save the changes, click OK and then Apply.
How to Improve Internet Speed?
Now that we’ve covered what slows down internet speeds let’s take a look at some ways to boost Wi-Fi and enjoy faster internet:
- Improving Router Location
Improving internet speed can be as simple as finding the sweet spot for your router. To ensure a strong signal, position the router in an open area, away from obstructions like walls and furniture. You can enhance signal propagation and maximize coverage across the room by elevating the router. Bandwidth control is necessary to improve internet connection.
- Spending Money on Top-Notch Tools
A dramatic improvement in download speeds is often possible with an upgrade to a high-quality router and modem. The most recent Wi-Fi standards are compatible with state-of-the-art hardware, which improves network performance and data transfer rates. Think about investing in routers equipped with features like MU-MIMO, beamforming, and quality of service. You can also use a free bandwidth limiter.
- Interference Reduction
In general, interference can slow down the internet. Baby monitors, cordless phones, and microwaves are common things that can interfere. If feasible, keep these devices away from the router or on a different frequency channel. Also, simultaneously using only a few devices on the same network can keep speeds from dropping too low.
- Software and Firmware Updates
Regular firmware and software updates for routers typically include new features that greatly enhance internet performance, so users should update theirs often. In addition, to guarantee a fast connection and eliminate any possible security flaws, update the operating systems of the devices (computers, mobile devices, and routers).
How to Clear Browser, System Cookies & Temp Files Manually
Every platform has its method for erasing cookies and cache. Consequently, we provide comprehensive instructions for clearing your browser’s cache and cookies across all devices and versions. Check out this space on how to delete temp file on windows.
Method 1: Clear Cookies on Chrome
Step 1: Press the three vertical dots in the upper right corner of the screen to access the Chrome menu, where you can adjust settings and personalize your experience.
Step 2: Select More tools by hovering over them. Delete all saved cookies.
Step 3: You can only leave cookies and other site data boxes checked to avoid clearing your history or cache.
Step 4: Use the drop-down menu to choose a time range. Click the “Clear data” button to remove all cookies from Chrome.
Method 2: Firefox Cookie Clearing
Step 1: You should see the menu icon in the upper right corner of your Firefox browser (☰). Click on that.
Step 2: Choose “Settings” from the menu that appears.
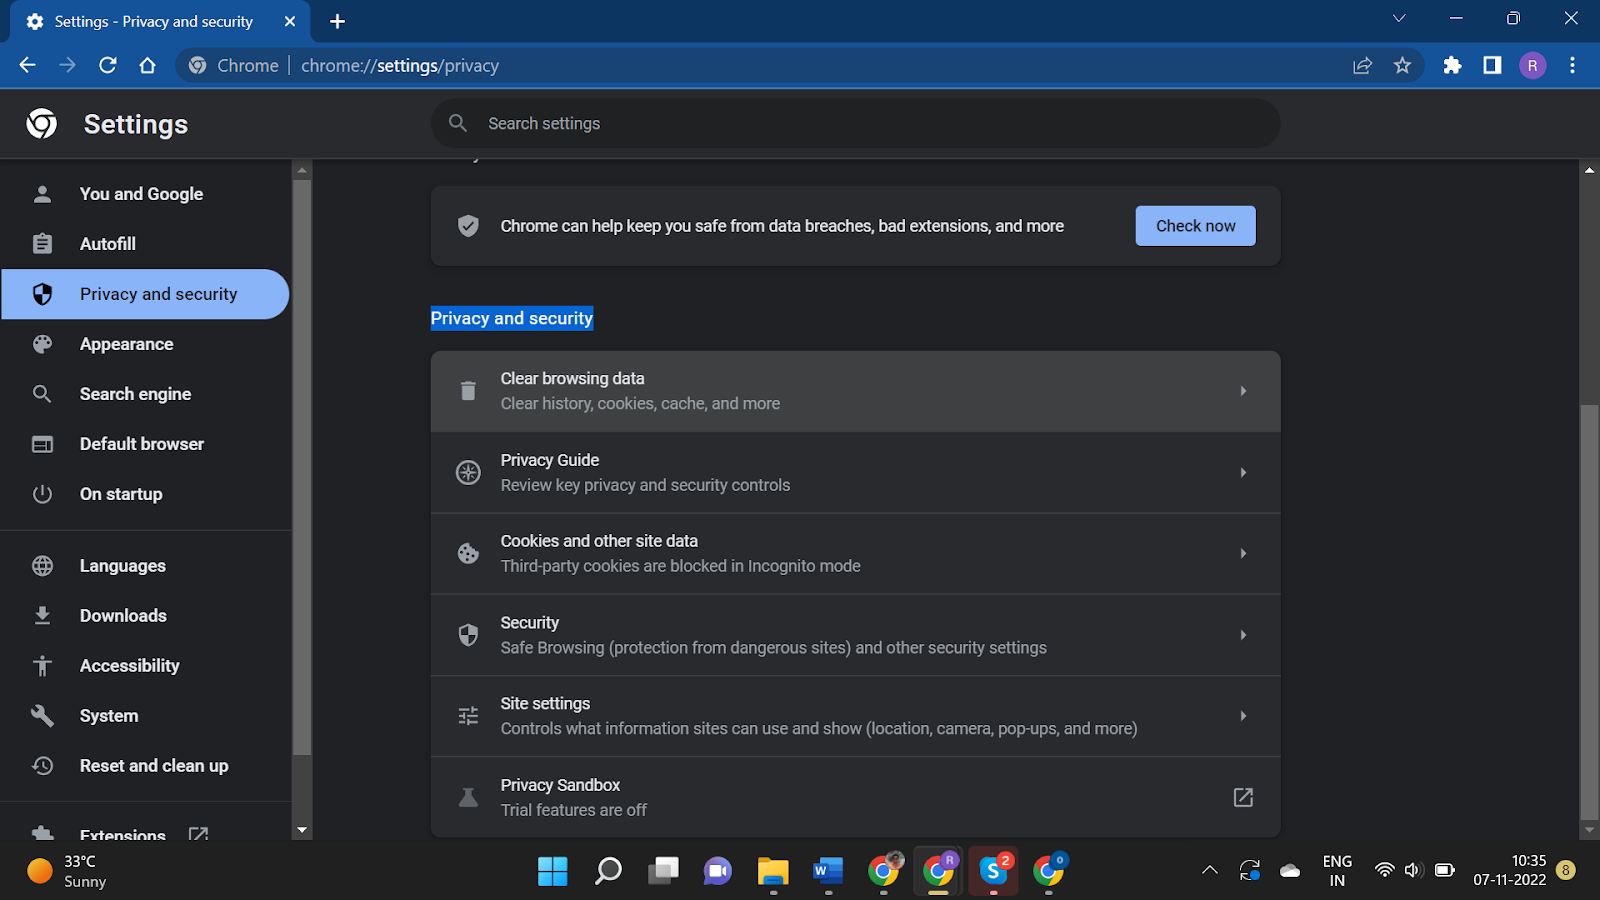
Step 3: On the left side, you should see “Privacy and security.” Click on that. To access the Cookies and Site Data section, scroll down.
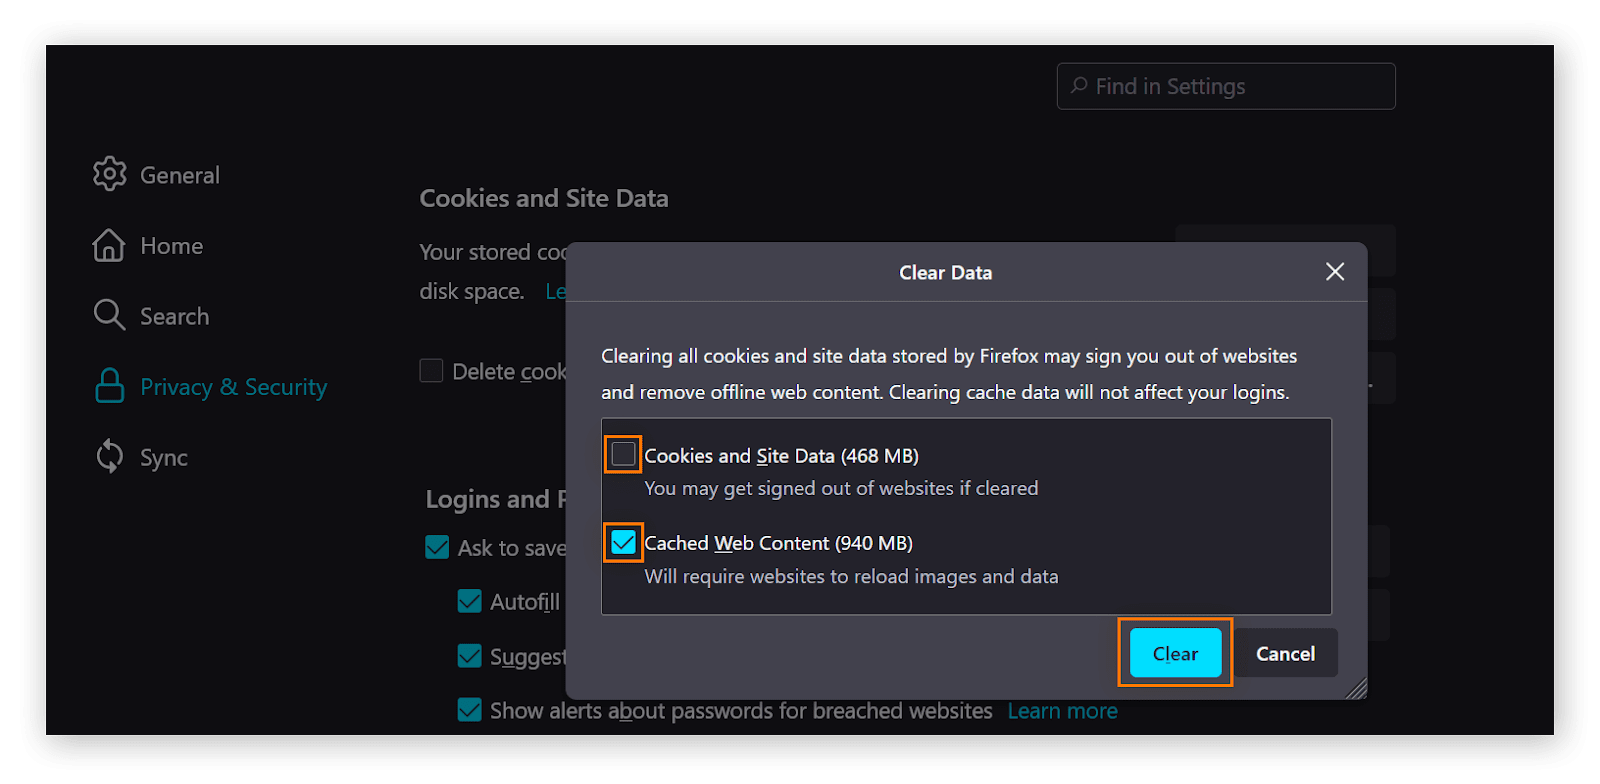
Step 4: Choose to erase all data. Pick and choose what you want to delete. If you want to proceed, tap Clear now.
Method 3: Clear Cookies on Microsoft Edge
Step 1: Press the three dots in the upper right corner for Settings. Select “Cookies and site permissions” from the menu on the left.
Step 2: To remove all site data and cookies, click the “Manage” button. To view all of a site’s cookies and data, visit. Pick what you want to delete or delete everything.
Method 4: Clear System Cookies
Step 1: Press the Win key and type Disk Cleanup to select the Disk Cleanup Utility.
Step 2: Select the C: Drive or the Windows drive that has all the system cookies.

Step 3: Let it scan and come up with all the removable cache and cookies. Select all of them and click on the Apply and OK buttons to remove them from your device.
Method 5: Clear Temp Files
Step 1: Press the Win key + R to access the Run Command window.
Step 2: Type Temp, %Temp%, and Prefetch commands one by one. A new window will open exploring all the temporary files and removable files.
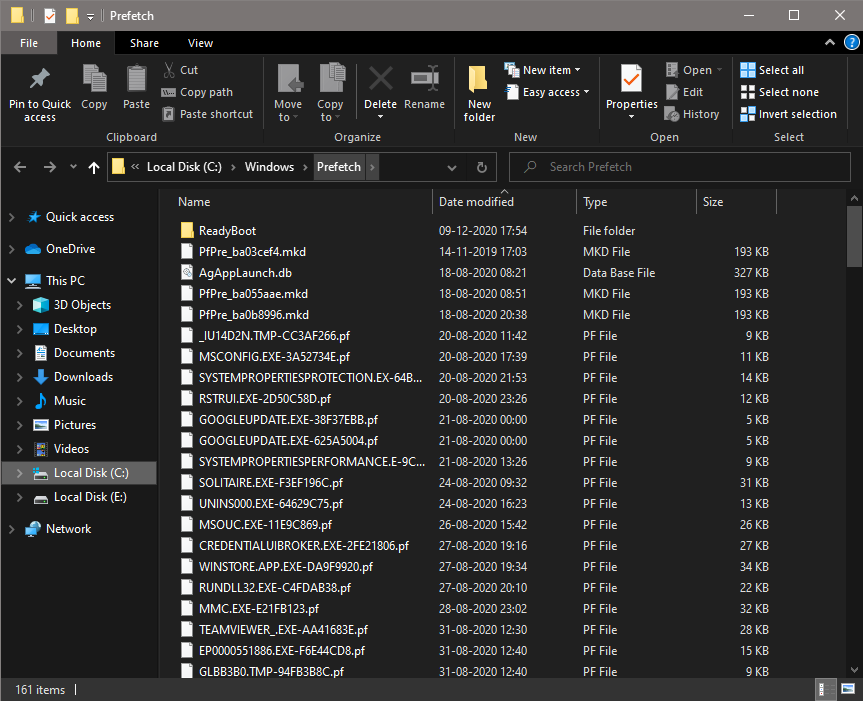
Step 3: Press Ctrl + A to select all of them and Shift + Delete keys to delete them from the selected folder.
Conclusion
In Windows 11, adjusting the bandwidth limit is as easy as following a few steps. The first step is to open the Settings window and go to the Network tab. Second, go to the network connection’s settings and find the ‘limit’ option. The last step is to fill out the ‘limit’ field with your desired bandwidth limit. Use a free bandwidth limiter to change the bandwidth limit in Windows 11.
